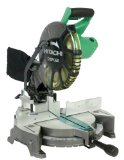
Compound Miter Saw
Since the last time you were here, I didn’t have time to get the Y-axis drawings done for my CNC Router so today I want to talk just a few minutes about how to cut crown moulding. First there seems to be some division about the correct spelling of the word moulding. The British version of the word uses the “ou” form while in America, you see it spelled molding. No matter how you choose to spell it, being able to cut it correctly is the important thing.
To me, no room is really quite complete without crown moulding and baseboard moulding to finish the top and bottom of the wall. Even in rooms with sheetrock walls and ceilings, I prefer to have crown moulding in the room. It’s a little like hanging a picture on the wall with no frame around it. It just doesn’t seem complete without the trim.
When it comes to cutting crown moulding, or any moulding for that matter, I love my compound miter saw. The smooth action of the pivot, the positive lock of the miter, and the clean action of the blade guard, makes this saw a pleasure to use for all my mitering needs.
The first thing I do when I’m ready to cut the crown moulding for a room is measure the full length of every wall in the room and make a sketch of the room with these measurements.
There is an old rule-of-thumb when cutting crown moulding. You cut it upside down and backwards. What this means is this. The flattened back edge of the moulding that will go against the ceiling must be placed against the saw table and the flattened back edge of the moulding that touches the wall must be placed against the saw fence.
For an inside left cut, the moulding goes on the right side of the saw and the saw is angled to the right. Inside right cuts are just the reverse. For outside left cuts, the moulding goes on the right side of the saw and the saw is angled to the left. Outside right cuts are just the reverse.
You never lay the moulding with it’s back horizontally on the saw table or vertically against the saw fence. The moulding must fit between the fence and the table in exactly the same orientation that it will fit between the wall and ceiling in the room, except when you place it on the saw, it must be upside down. When the moulding is turned right side up again after it’s cut it will be perfect.
It’s always best to work with a short piece of moulding until you get the hang of cutting upside down and backward. This is especially important if you have a room with odd angles, such as rooms with vaulted ceilings. It’s much easier to handle the short pieces when doing test fits than trying to test fit a long piece of moulding.
When I need to join two pieces of moulding together on a wall, because the wall is longer than my moulding, I always try to cut the bevel so it faces away from me when I enter the room. This way the joint is much less visible than it would be the other way because you are not looking into the joint but rather across it.
And one last thing, I always use a nail gun to fasten up moulding. It’s hard enough hanging crown moulding without trying to do it with a hammer and nails. I hope the next time you visit, I’ll have some more drawings done for my CNC Router and we can talk about that. Until then, stay safe, work hard, and as always, thanks for stopping by MVB Crafts.
Regards,

P.S.
If you would like to purchase a compound miter saw, click the link and purchase one from Amazon. By clicking the link and purchasing through MVB Crafts, you will be helping to support this site and allowing us to continue to bring you quality content.
Thanks.

