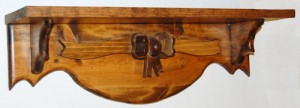
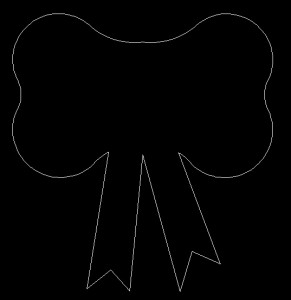
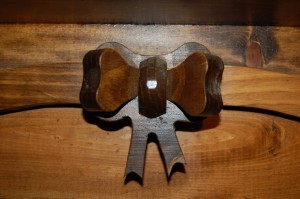
In the last article in this series, I explained how to make the ribbon for the 24″ Ribbon and Bow Shelf. In this article, we will create the bow for the shelf. The outer part of the bow is actually one of four parts of the complete bow assembly and is fairly easy to make since bows are not usually symetrical. The image below shows how the outer bow should look.
To create this part of the bow, first cut a piece of 1 x 4 material 3-3/8″ long. The simplest way to make this part is to refer to the image above and draw the pattern on a piece of posterboard freehand that looks like the image and fits on the 1 x 4 piece you cut earlier. This may take a bit of trial and error, but this method is much easier than trying to draw out the pattern with arcs and lines. Once you have the pattern sized properly and cut out, simply trace it onto the piece of 1 x 4 and cut it out. When you’ve sanded this piece, lay it aside and we’ll create the inner part of the bow.
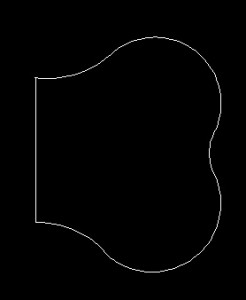
The inner part of the bow will be a little more complicate to make because it has to be cut at a 45 degree angle to make the completed bow 3 dimensional. Using the image above, lay out a rectangle on a piece of poster board that is 1-3/4″ long and 2-5/16″ wide. Freehand a sketch on this piece of posterboard until you get an image like the one pictured above. The straight side of the pattern must be 1-1/2″ wide. The bow does not have to be perfect because ribbon bows are not usually perfect. Just get as close as you can.
The first step to cutting this part of the bow is to take a piece of 1 x 4 that is at least 12″ long and cutting a bevel of 45 degrees on both ends of the piece. The reason you will need a piece of wood this long is for safety when making the 45 degree cuts. Trying to cut any piece of wood that is too short to fit across the gap on your miter saw and too close to your hand is simply too dangerous. A bevel cut, as you may already know, is an angled cut through the piece of wood from one face of the piece to the other. A miter cut is an angled cut across the face of the piece from one edge to the other.
Take the piece of 1 x 4, lay the pattern on one end and trace around it, then do the same thing on the other end of the board. It does not matter which face of the board you draw the pattern on as long as you do the same on both ends. Now cut out the two pieces with the saw of your choice, sand them, and lay them aside for later.
The last piece of the bow is the knot and is made by simply cutting out a 1-1/2″ circle from a scrap of 1 x 4 and then cutting the circle in half. Using a belt sander, round over the front and back edges of the knot to give it a contour on both sides of the arc. Do not sand the straight cut on the knot because this is the part of the know that attaches to the outer bow.
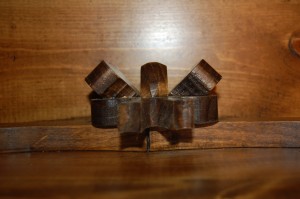
Using the images below, assemble your bow pieces using wood glue and clamps. Let the bow sit over night to give the glue time to dry. Now attach the bow to the center of the face of the ribbon you made in the last article.
In the last article in this series, we will be assembling all the parts of the shelf that we have cut out in the previous articles. Until next time be careful, and as always, thanks for stopping by.

